Highlining is a dangerous sport, coding and thinking you know eveything is worse!
Make sure to read all the text. It should contain all the information necessary to understand how this page works.
Please understand that this simulation has not been validated by real life tests yet.
I believe the calculations to be correct, but any results that come out of this model should be taken with caution. It it only a tool to help take decisions, not a safety measure.
Welcome to the simulation
Here is where you can enter the specifications of each webbing in your setup. You can find those characteristics on the manufacturer's website, or on the slackline database.
For each webbing type, specify the weight in grams per meter (important for long set-ups), the stretch in percentage, and the force in kN at which this stretch is measured. You can also change the name of the webbings at your convenience. A set of default webbings loads automatically, but you can entirely customize them.
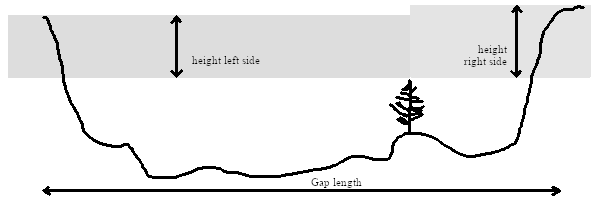
Now you specify the caracteristics of the spot where the line will be rigged. We need the distance between the two anchors, and their height. Since not all lines are level, you can choose the height of both anchors. The sections above will be rigged left to right across the spot. Tension happens just below.
If you want to see the results in terms of sag, enter 0 as the heigth of the anchors. If you want are worried about an obstacle below the line, enter the height of the anchors relative to this obstacle.
You can adjust the tension of your line in two ways: automatic tensioning by specifying a tension, or by manually pulling some length of webbing from one side or the other.
Simply specify the desired tension and choose from which side you pull to automatically get to that tension.
Adjust the tension of your line as you would in a real spot: by pulling in some of the webbing on either side. Use decimals to tune exactly your tension.
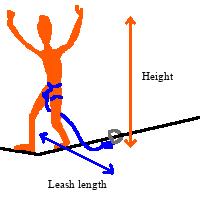
Describe the slackliner, their position on the line, and the amplitude of their bounce.